


Everyone nowadays wants to speed up their site to every millisecond, as it provides best user experience by reducing your site’s load time making it more search engine friendly and helps in search rankings. There are many ways to make your WordPress blog or site load fast, like using W3 Total Cache plugin to improve efficiency of caching of the files, using CDN to serve images from multiple locations and also some server tweaks. Some are free to use and some may cost you in bulk.
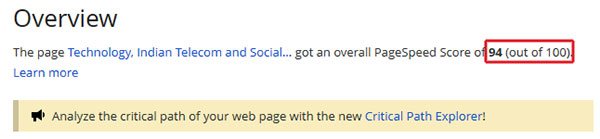
One of the free option (currently free in beta stage) available from Google itself is the PageSpeed service. You may have used the Google PageSpeed online or the browser extension or Mod PageSpeed for analyzing and improving your site performance. SharePress is fully optimized by Google Pagespeed service, if you check our rating, it will be 94 out of 100. Yup that’s a great score, and we are trying to achieve more than that.
Google PageSpeed Service is another such service which allows you to optimize your pages automatically on the fly. Just use this service from Google and it will take care of your site performance.
As said by Google“PageSpeed Service is an online service to automatically speed up loading of your web pages. PageSpeed Service fetches content from your server, rewrites your pages by applying web performance best practices and serves them to end users via Google’s servers across the globe.”
An all in one service by itself, Google PageSpeed service fetch your website content, optimizes it and serves from various Google CDN locations,.
Let’s see how to set up the Google PageSpeed service on your WordPress blog or website.
Step 1- Get Started
Google PageSpeed Service is currently in a beta stage with invitation only join, to get access to the service you need to fill out this form and wait for the approval (probably it will take 2-3 days). If your request gets approval, Google will provide you with all initial details of using the service.
Step 2 – Domain Setup
Once you got access to Google API console to Google PageSpeed service, you will have an option to add a domain name to the service. Enter the domain name in the format “www.example.com”, note that naked domains (example.com) are not currently supported by the service.

If you have never verified the ownership of your domain through Google Webmaster Central, then you will be asked to “claim domain ownership” by following the steps in Google Webmaster Central.
Now after verification, you need to configure the DNS for the origin domain, which will be used for the service. For the PageSpeed service to work it needs to fetch content from your live server. For this you will need to setup an origin domain, say orig.example.com. Follow these steps to configure the DNS setting for your origin domain.
- Login to your DNS provider
- Select a name for the origin domain that you are going to configure. eg. ref.example.com
- If www.example.com is an A-record pointing to a server/IP address, then setup a new DNS entry (A-record) for ref.example.com pointing to the same server/IP address as www.example.com
- If www.example.com is a CNAME record pointing to xyz.www.example.com then add a CNAME record for ref.example.com pointing to xyz.www.example.com
- Set the TTL to 1/2 hr (1800 seconds)
After you have set up the DNS for origin domain, you need to change the DNS record for the main domain now. This is done to divert all traffic coming to your main domain to Google’s servers. For that add a new CNAME record for www.example.com and set its value to ghs.google.com (If a CNAME entry for www.example.com already exists, change it value to ghs.google.com)
Step 3 – Configuring Rewriters
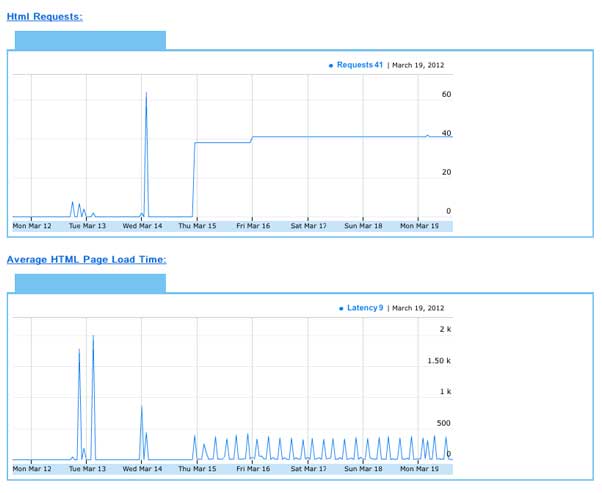
After successful setup you can monitor near-real time traffic and latency metrics for your web site from the Google PageSpeed “Overview” tab. On the Overview tab you can monitor the HTML Requests and Average HTML Page Load Time graphs, showing the number of hits received on your page and also the load time.
You will have the option to configure Rewriters to optimize your site to your needs.
- HTML Rewriters – optimize HTML files serving and caching
- CSS Rewriters – combine and minify CSS files of your website
- Image Rewriters – optimize the images on your site, by converting it to low size formats and also use of lazyload images features to loading images until they are visible in the client’s viewport.
- JavaScript Rewriters – optimize the JavaScript and to combine them to reduce http requests.
(See the image below to have quick glance of all the rewriters available – click on the image to enlarge)
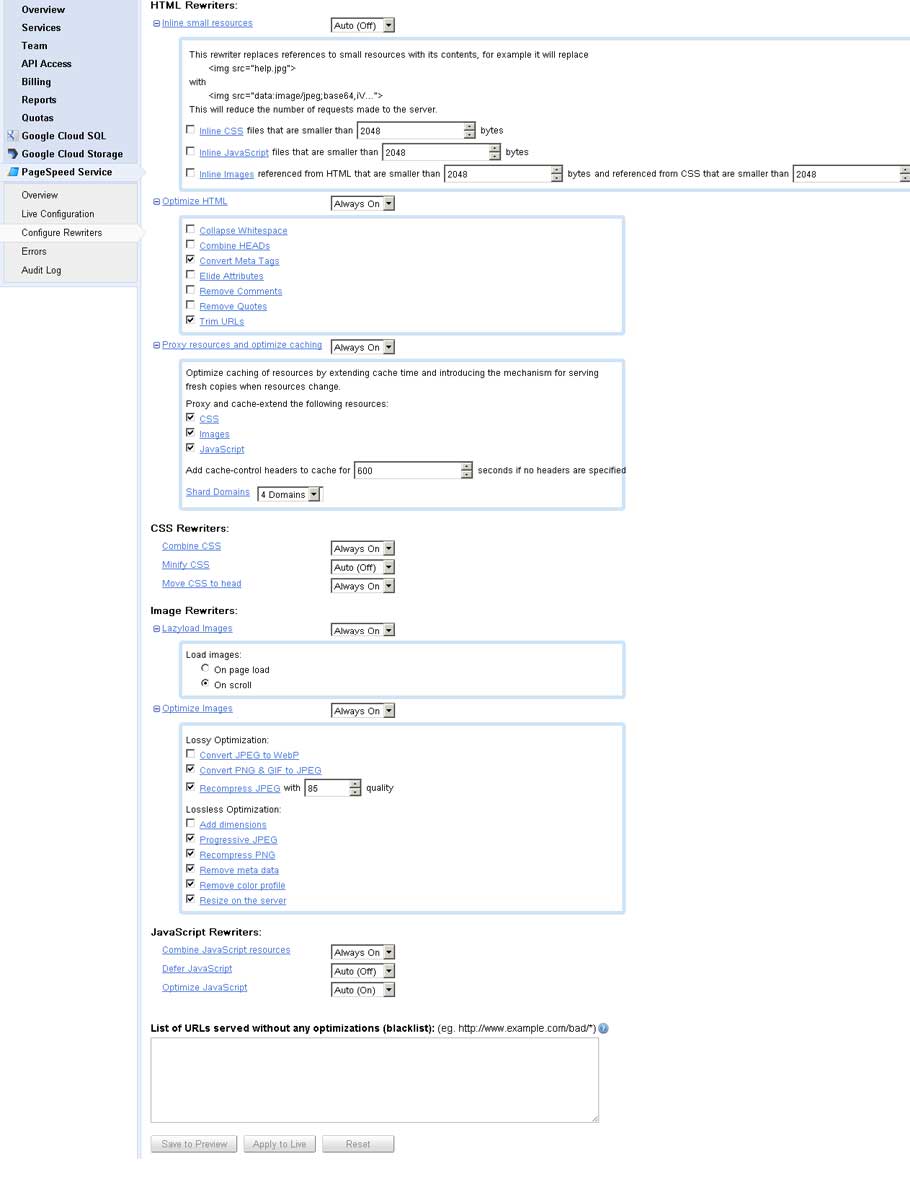
You will have the option to blacklist some URLs of your site, which will be served without any optimization.
Step 4- Reporting
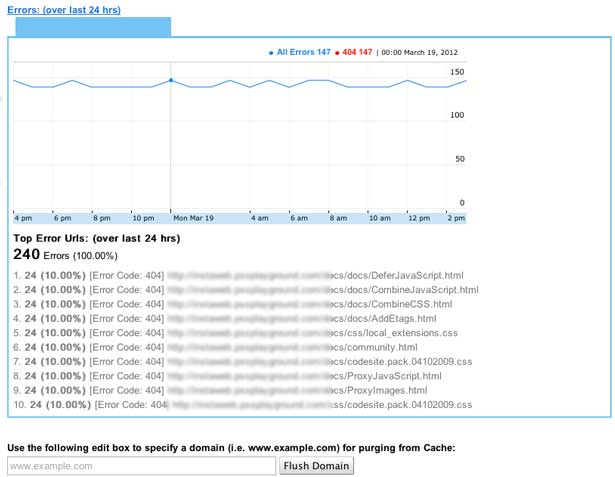
Google PageSpeed service also reports Errors while serving the rewriters, this are listed under error tab. The Error graph lists the number of HTTP errors served on your website over the last 24 hours. The index for the plot lists each error type, along with the number of occurrences in parentheses. HTTP error counts are not only for HTML pages, but also for images, CSS and JavaScript requests.
When you start the Google PageSpeed service for your website, Google will be automatically set a default value for all rewriters, which you can change to suit your site needs. You need to tweak it until you a optimize configuration.
Your site is now optimized by Google’s PageSpeed service. Currently this service is free to use, so don’t wait to sign-up for this service and enjoy the benefits from Google to optimize your site. That’s all.
Do you use the Google PageSpeed Service for your site? Do share your experience with us.
[This article by me is being cross posted from Colorlabs Project Blog]